Hello again,
I am so excited to share one of my all time favorite diy’s, Gold Leafing! If you’ve read my previous entry, I know what you’re probably thinking and yes I AM obsessed with metallic gold. But I promise not all of my posts will revolve around it. But c’mon…it’s gold. Is there anything better?
…So, let’s get started. Gold leafing projects are some of the messiest I’ve done. With that being said- after you’ve done it once, you’re pretty much a pro. The reason I like these projects so much is because they don’t have to be perfect to look incredible! Gold leaf art is very much open to interpretation and adapts to all kinds of styles.
When I say “gold leaf”, I really mean metal leaf in the gold color option. They also have silver (which I used in some these diy’s), copper, bronze, etc. Then, you can choose from sheets or flakes. The flakes are definitely messier, but for some projects I think they look better. It’s just personal preference. The brand of GL that I order from Amazon (picture below) comes with 25 sheets for about 7 bucks, the flakes come with roughly the same amount for the same price, just all shredded up.

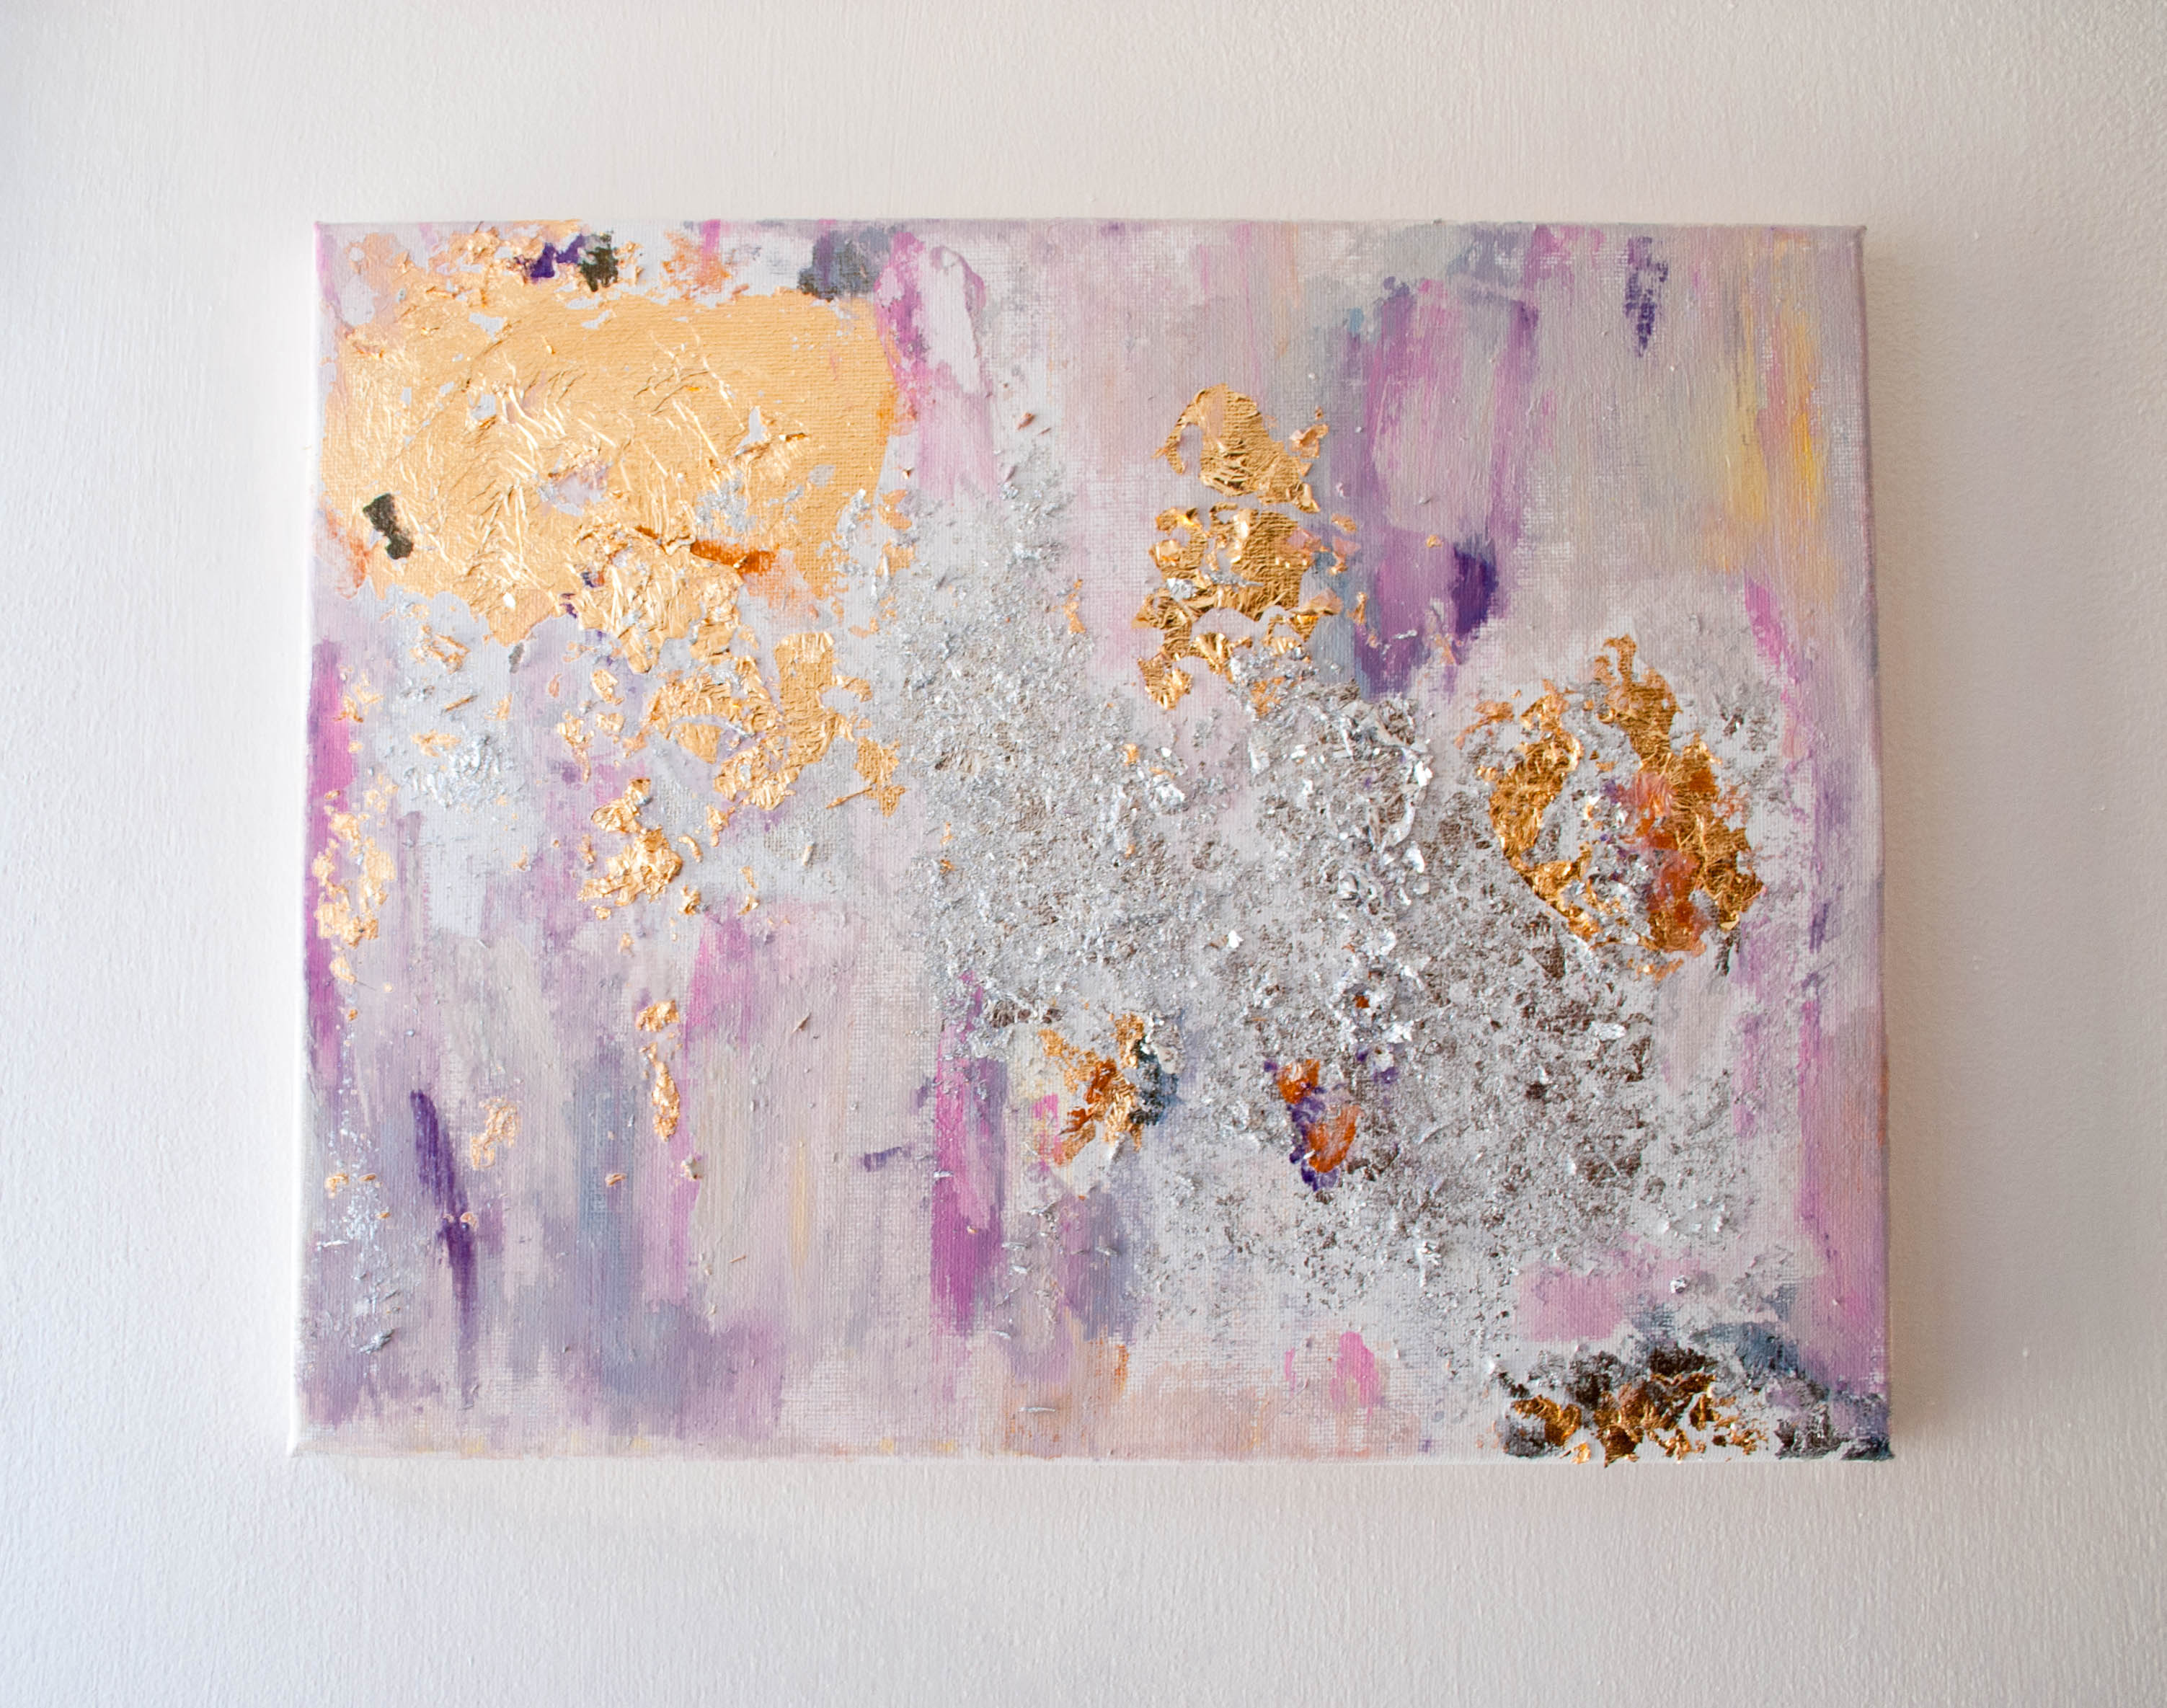
My first gold leaf project was an abstract canvas painting. I ended up doing a few large canvases for my bedroom a few weeks ago, but didn’t document the process. So I did one on a smaller scale than I usually prefer, just to show the steps. 
This project is SO fun…Ready. Set. GOLD!
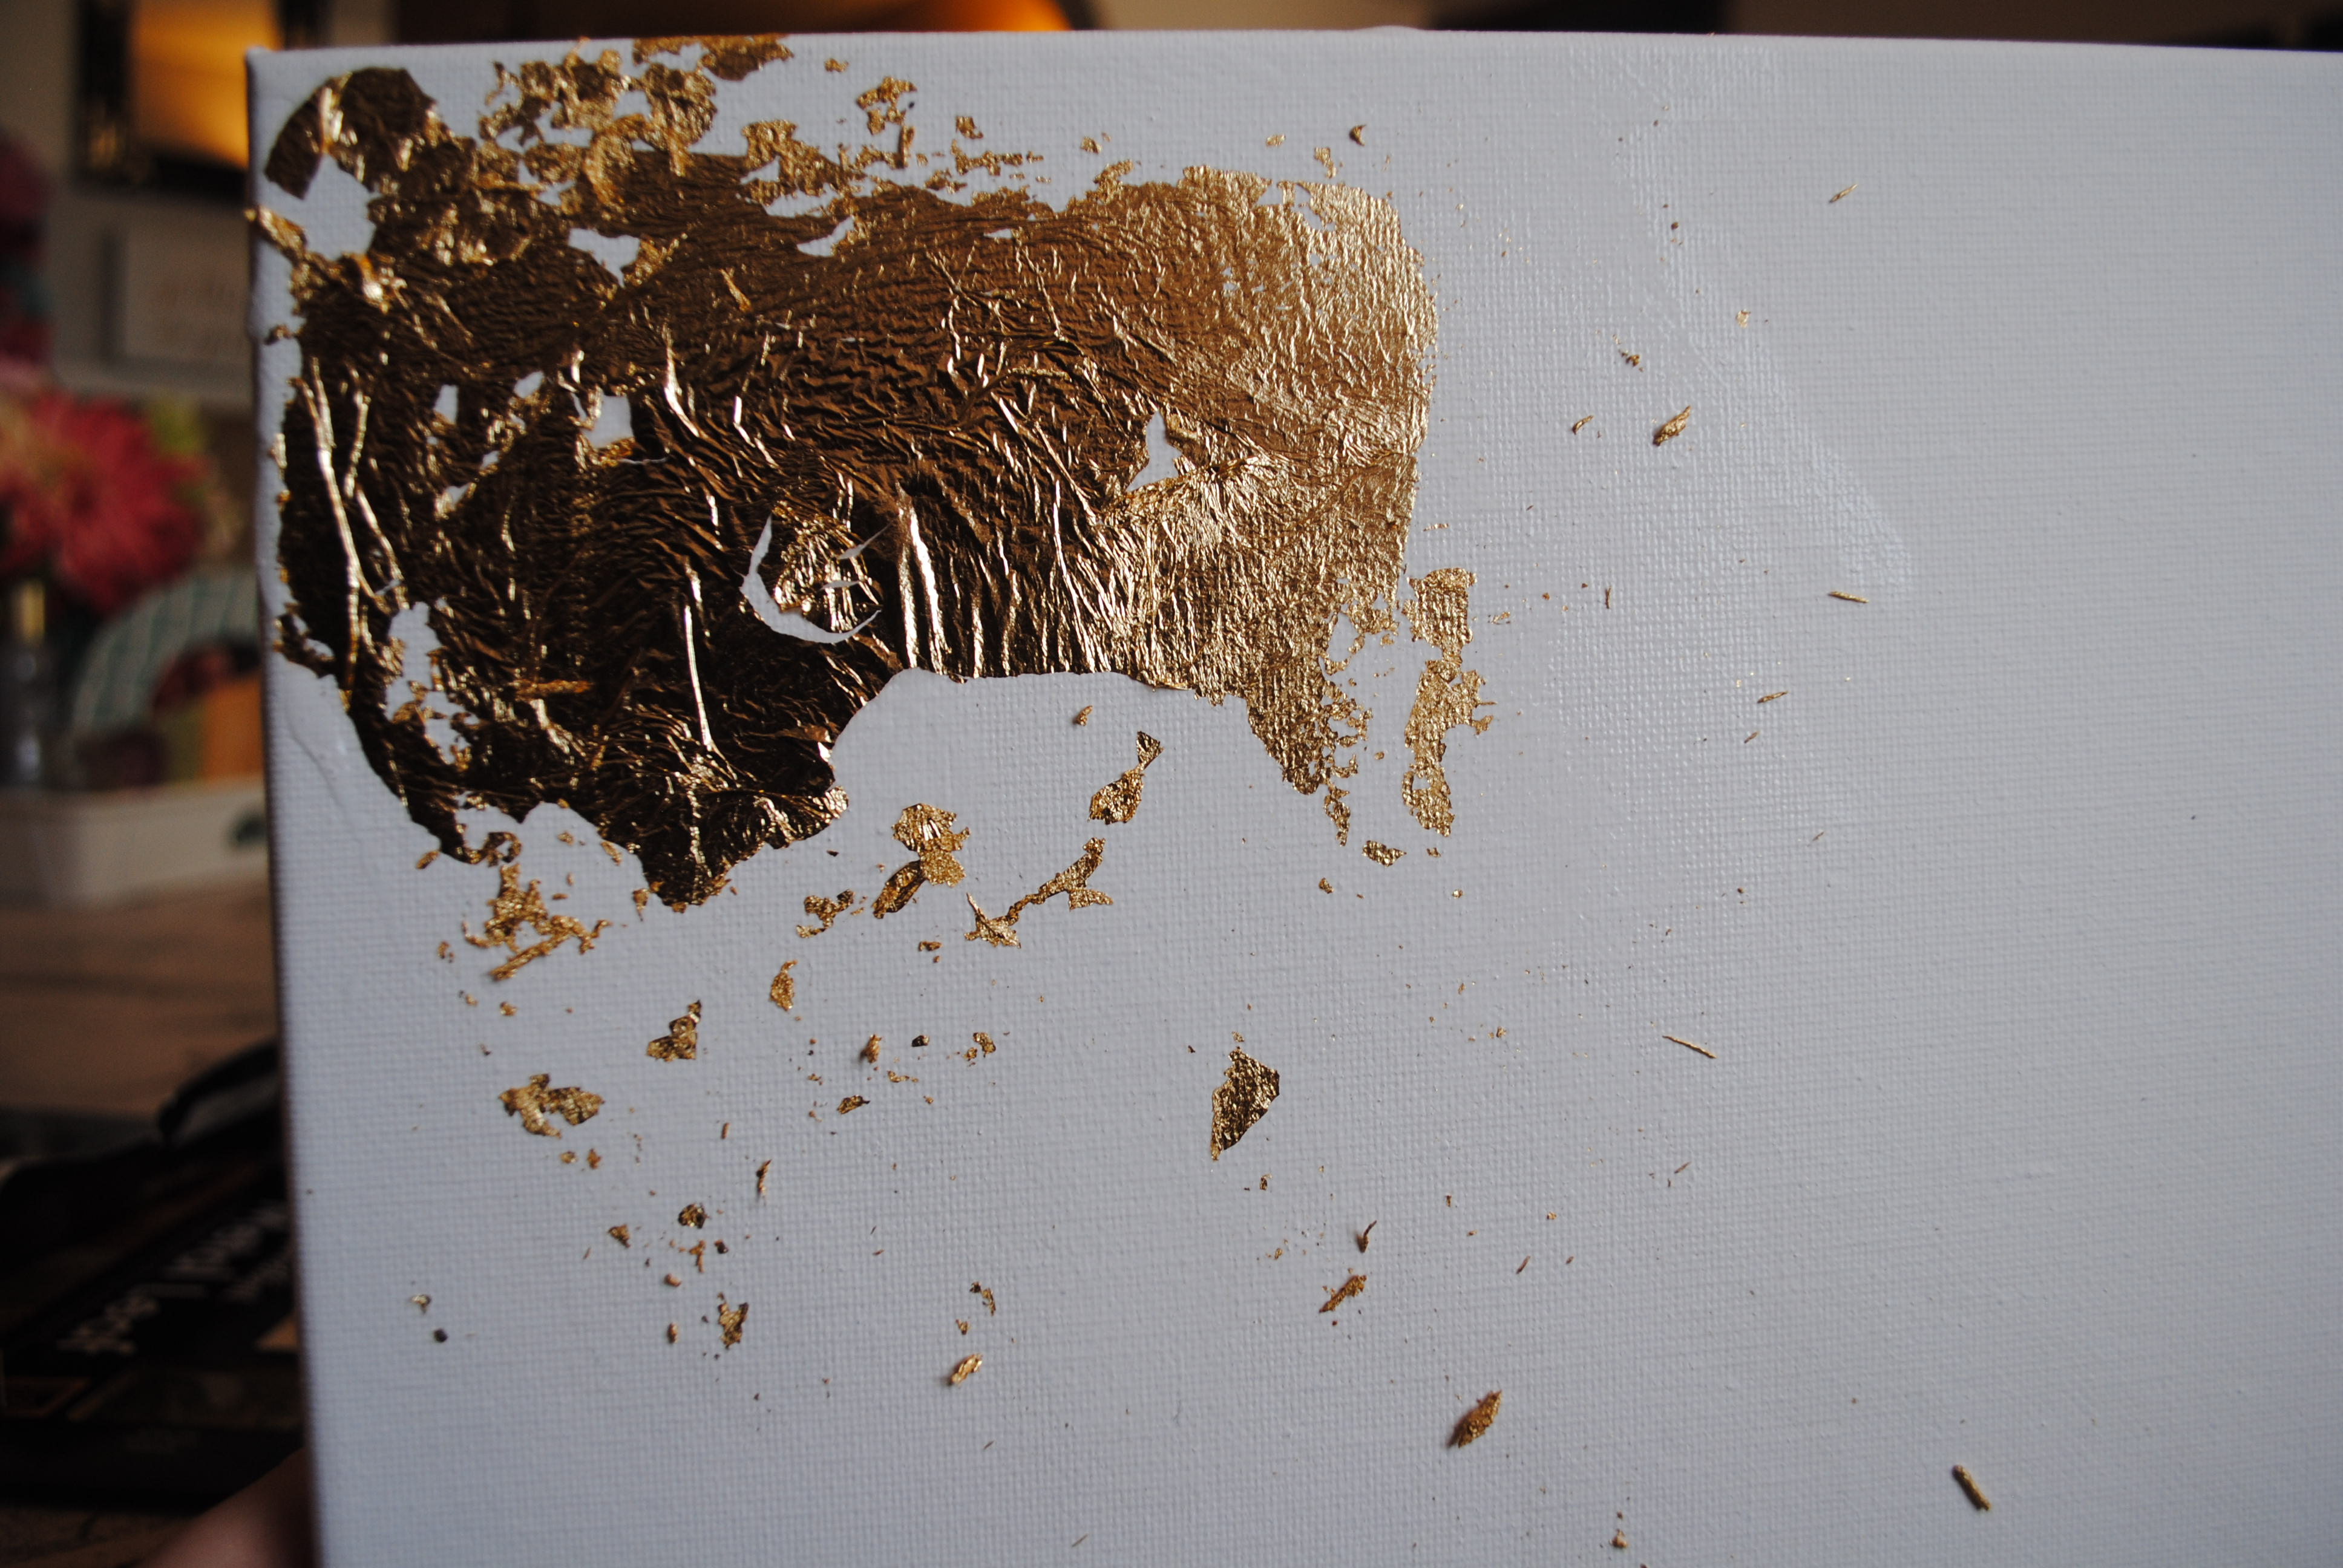
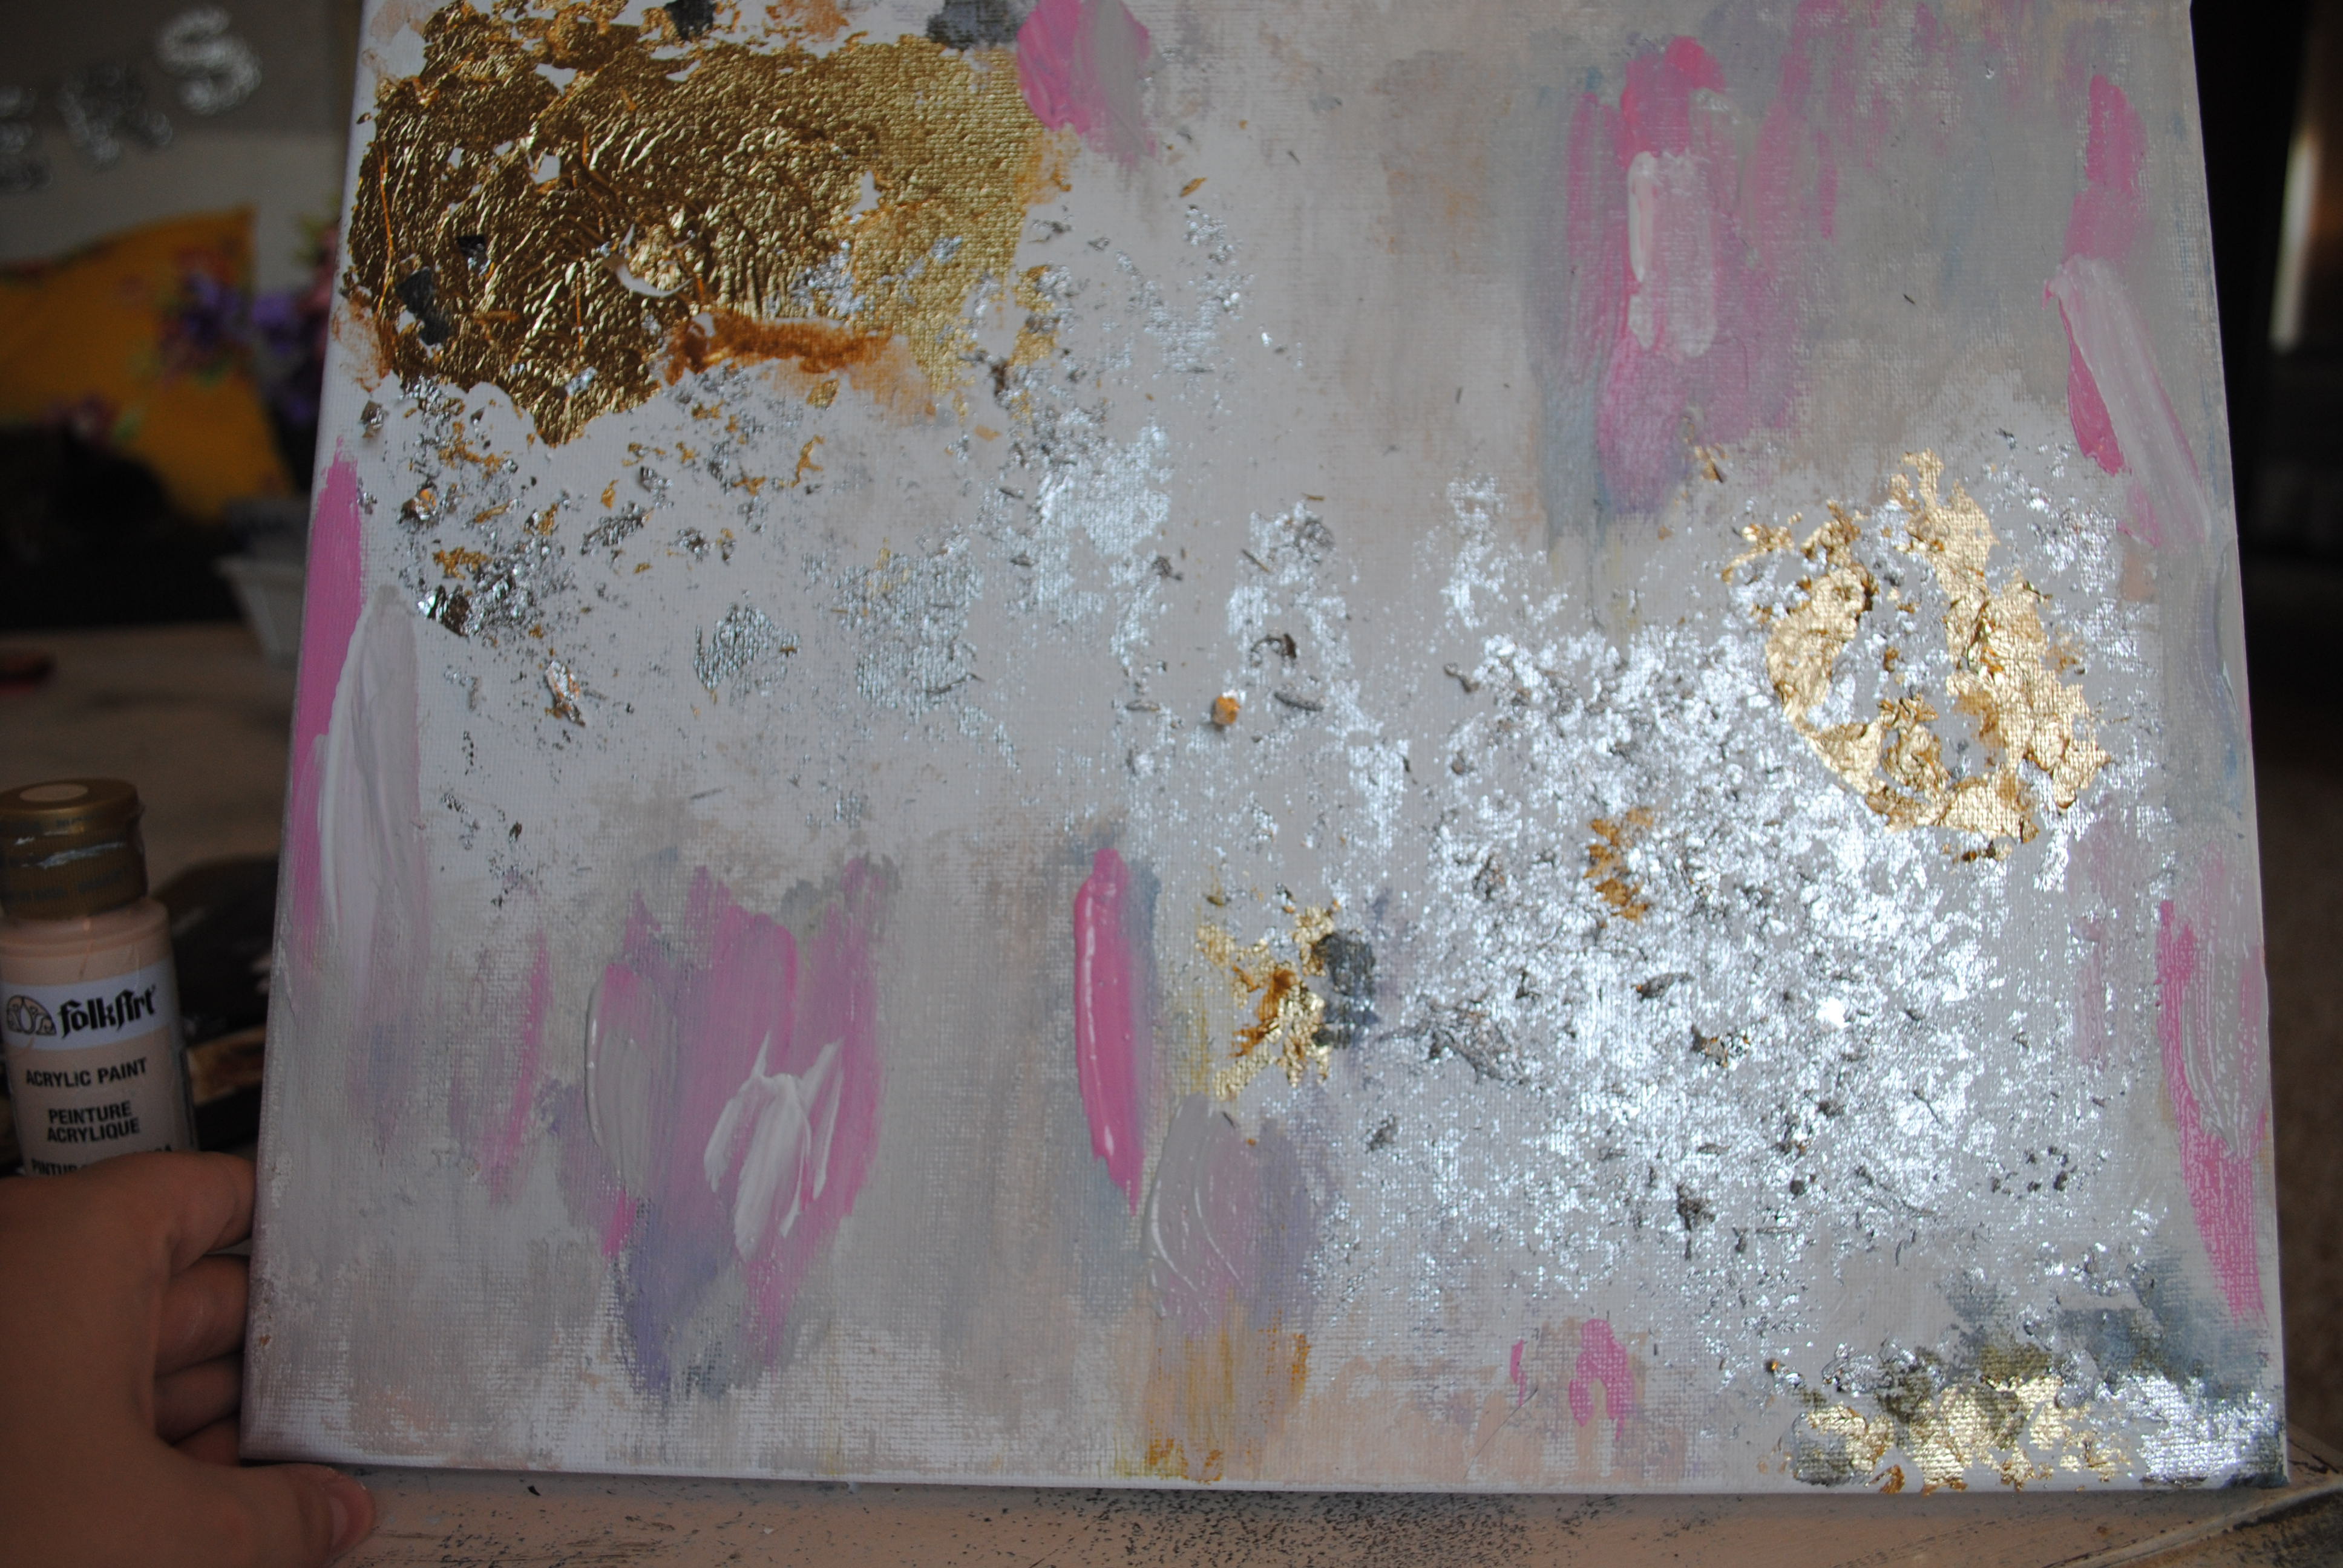
Preparation: Like I was saying, fun but MESSY. I would prefer doing my gold leaf art outside to avoid a major vacuum session. Unfortunately, where I live, the wind ALWAYS comes sweeping down the plain 😉 and gold leaf requires a Wind Free Zone. So…instead I lay out an old sheet or a broken down cardboard box before I start any leafing- but I usually end up all over the place, making a mess anyway. You’ll need a paint (or sponge) brush, Elmer’s glue (they make adhesive specifically for leafing but I prefer the elementary school throwback), paint, a canvas, and of course, your gold leaf.
First, just squeeze a little Elmer’s glue onto a canvas and swirl it around with your paint brush. Once you’ve done that, take a sheet of the GL (or a pinch of the flakes) and stick it right to the canvas. I usually pat it down GENTLY with the end of my brush or my fingers. Let it dry for the most part- about 45 seconds to a minute. Then (if you’re using the sheets) you can take your brush and swirl it around the edges to rough up the straight lines from the square sheets. Continue this step in all the areas of the canvas that you want to cover, let that dry, lightly dust off any excess and then you’re ready to paint.

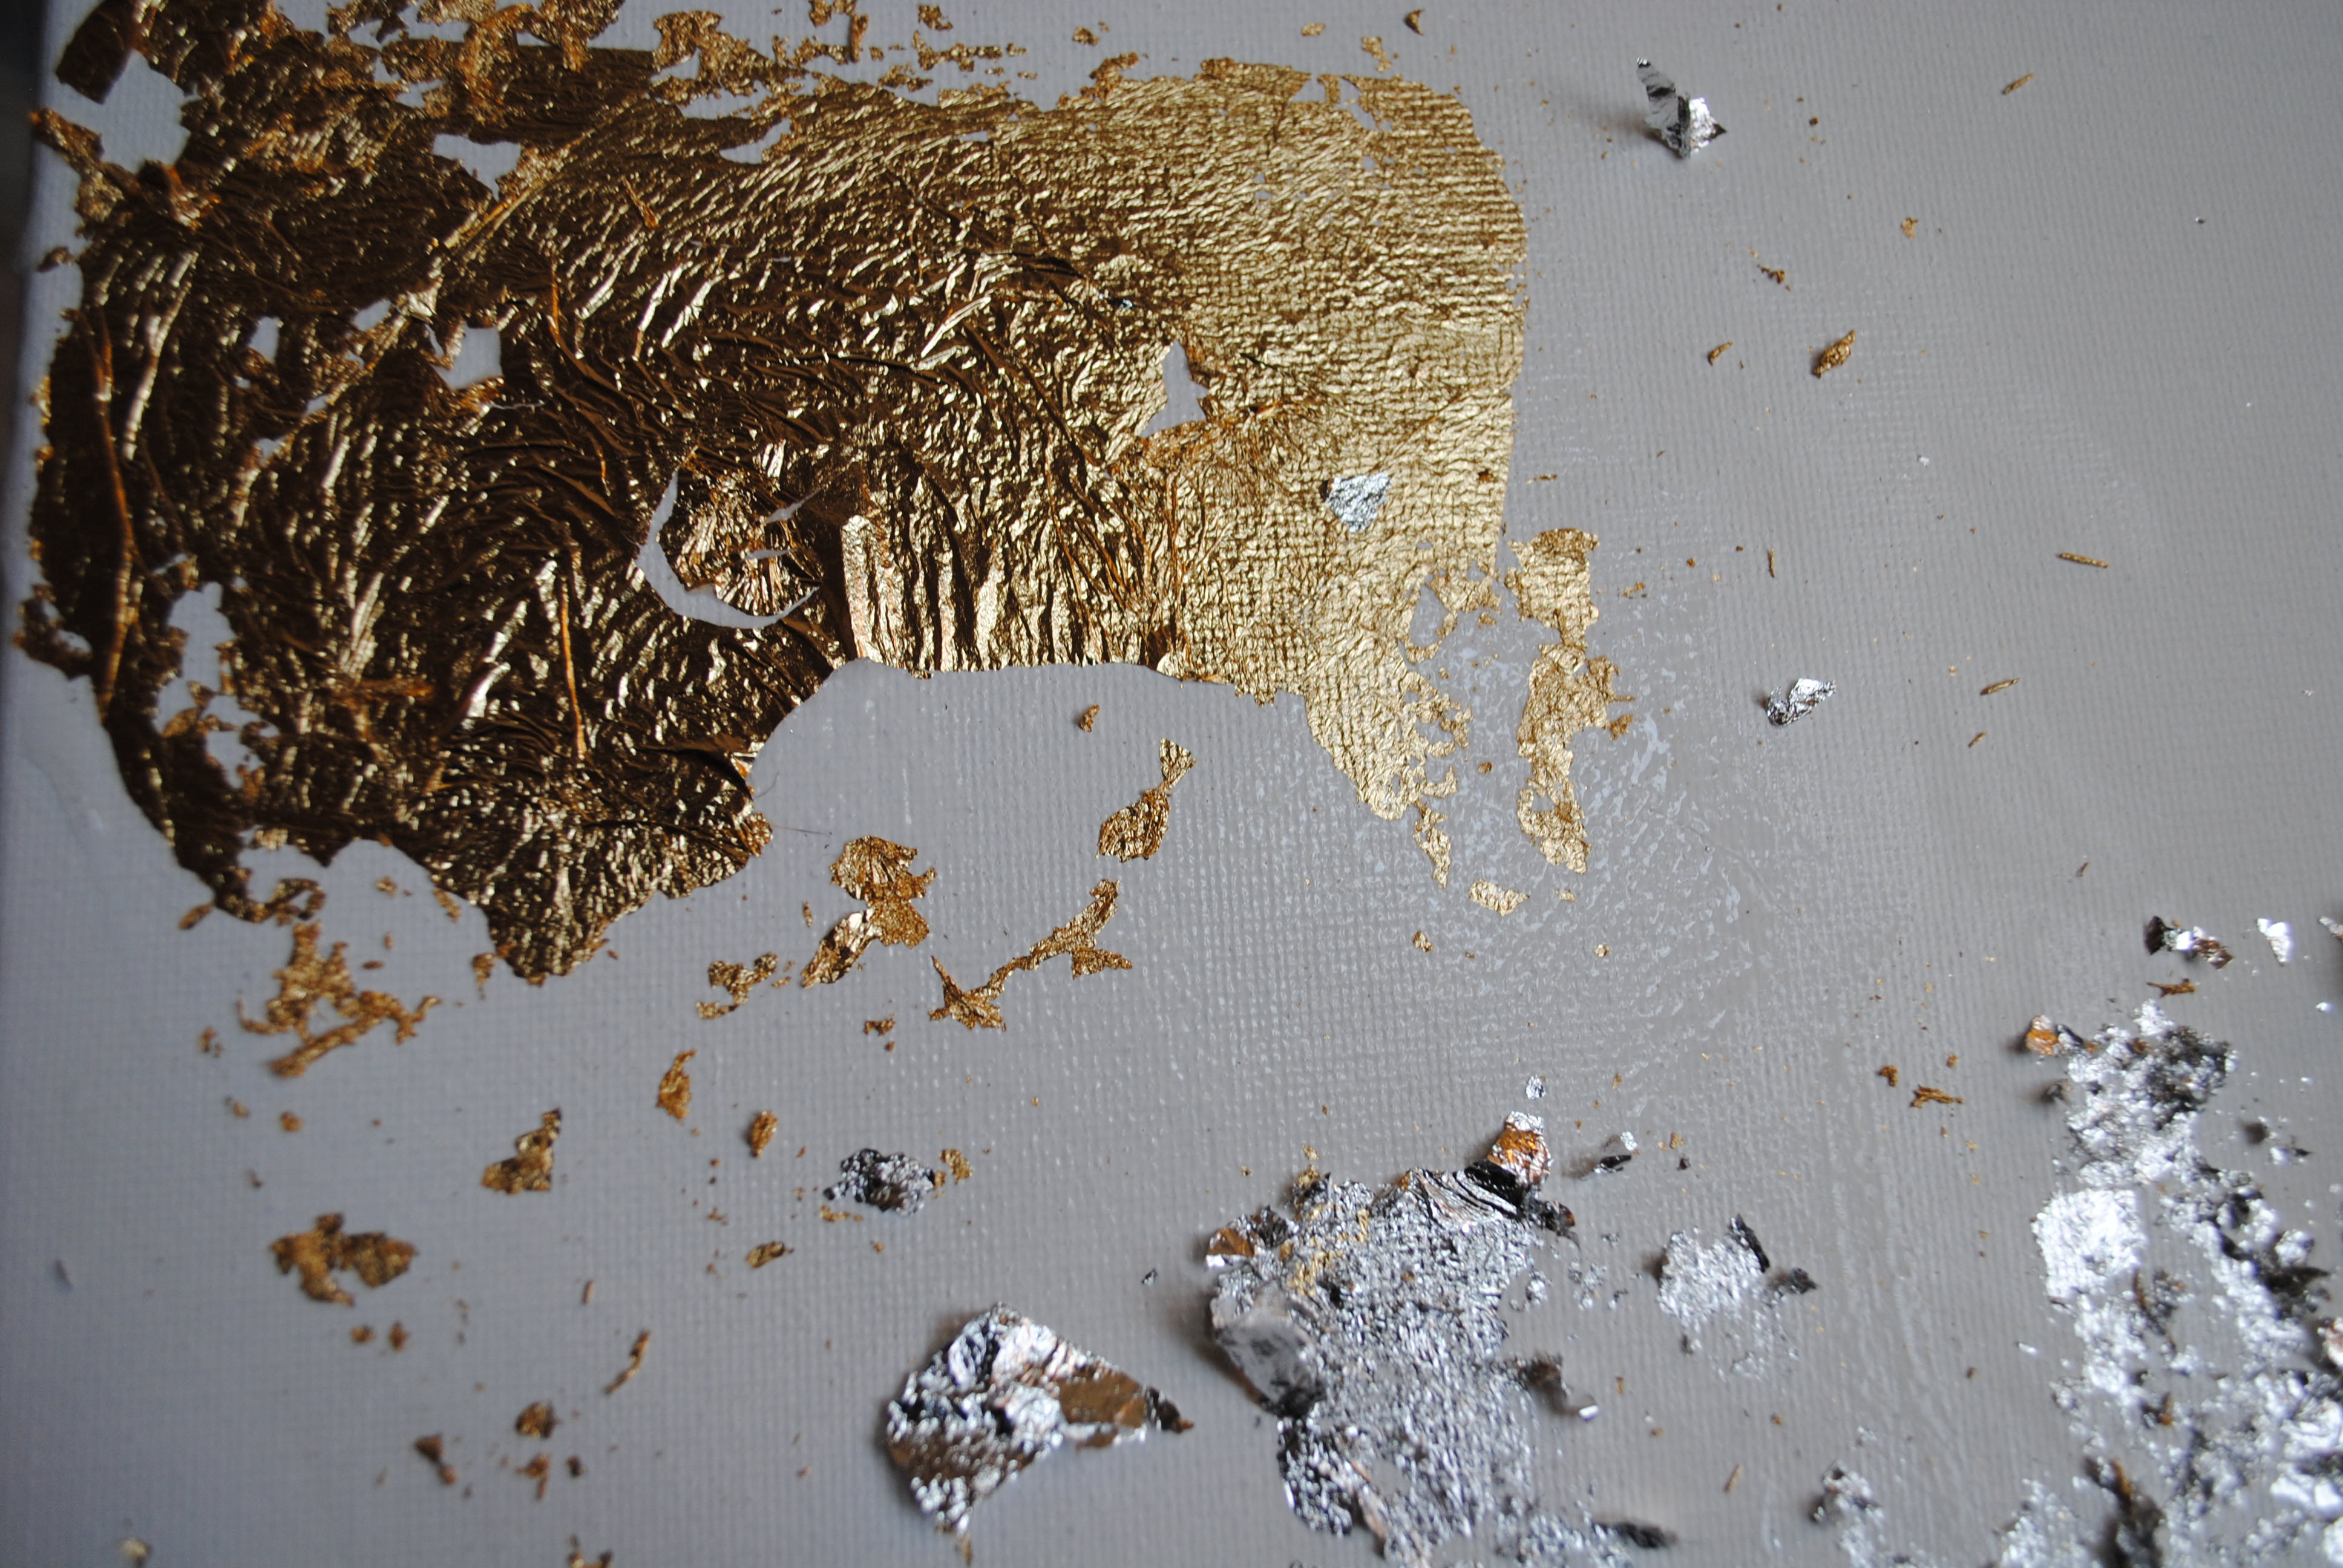
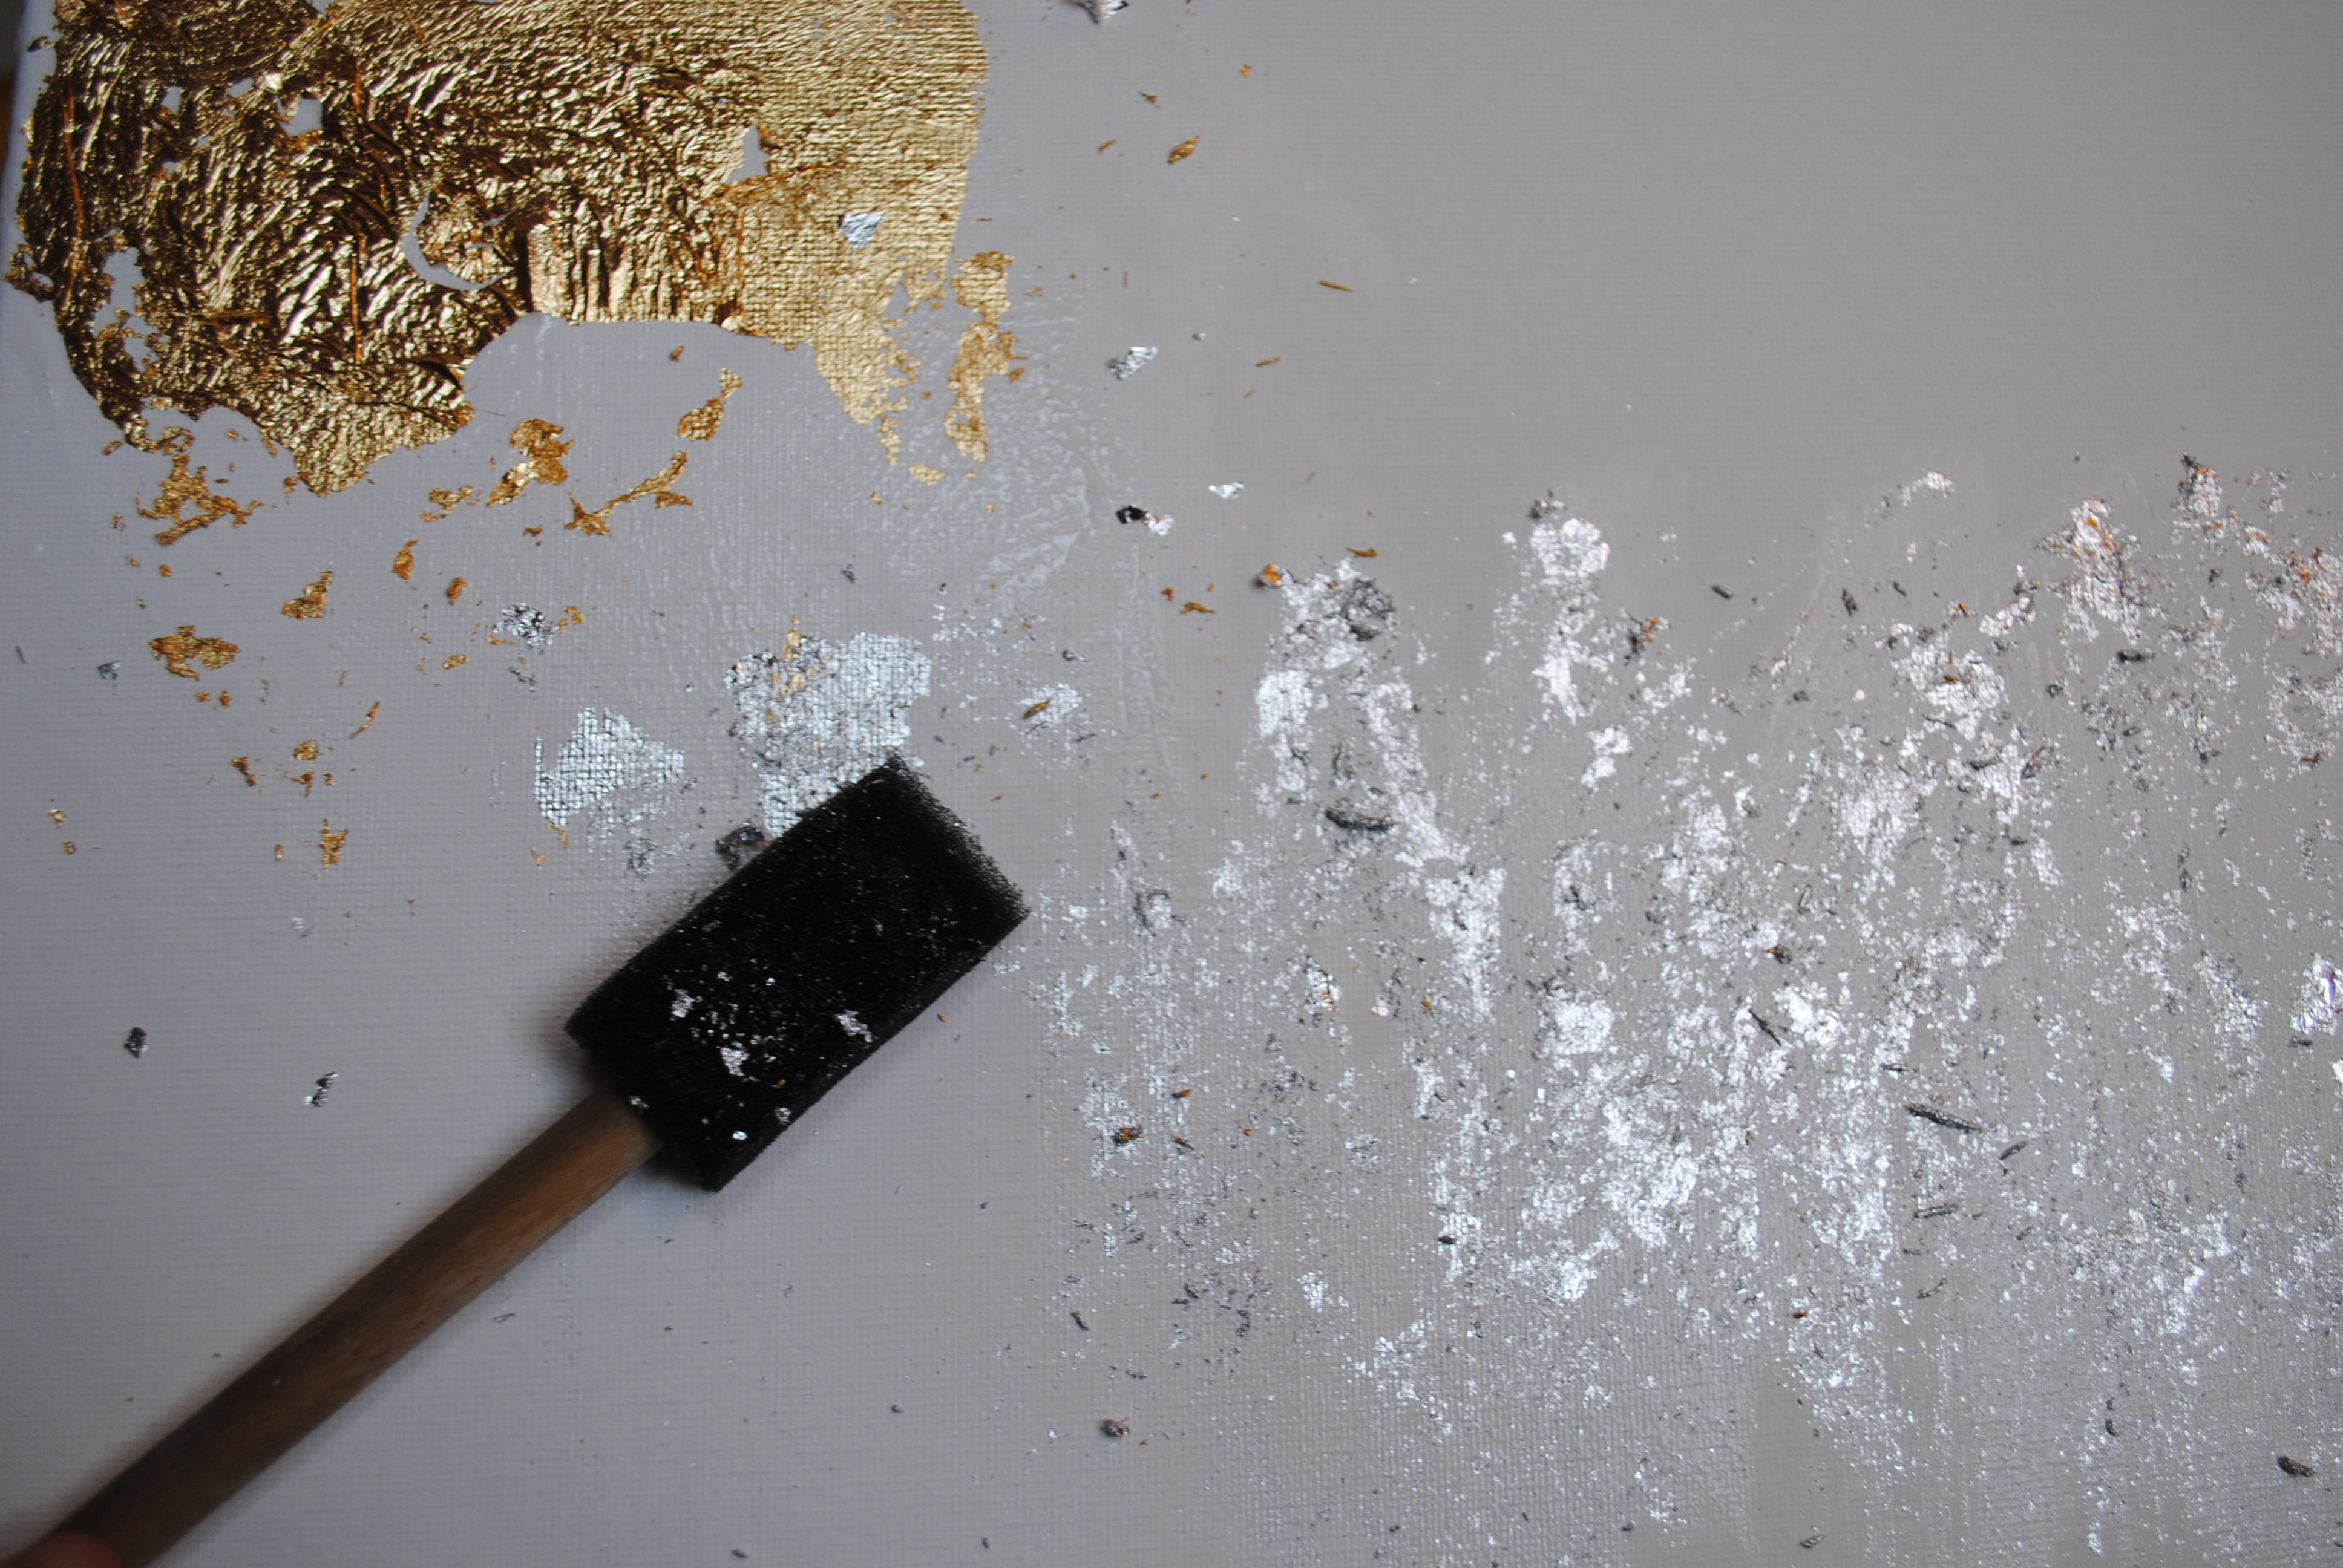 I added silver flakes to really show the different looks you get with flakes vs. sheets.
I’ve seen some people use oil based paint and mix their own colors from a standard set, but I always have a ton of little acrylic paints hanging around, so I just used what I had. I like to use mostly pastels, creams, grays and golds then give it little hints of black, navy or deep purples and blend those in. But again, you can’t go wrong with this…if you prefer bright or bold colors. Go for it!

 Not the best lighting but pictures just to show the blending process.
On my first set I used a swirling method with the brush, but this one I use vertical strokes for more of a ‘lined’ feel. There is no right or wrong way to do this project. They all turn out great and more importantly, one of a kind. And once it’s dry, if you don’t love it, you can always go back and add more leaf or blend more colors in, until it’s just right for you. ❤
So, now that you’re a pro at gold leafing. I’ll just leave you with a few ideas for GL projects to tackle!
Take an old plate and reinvent it into an adorable jewelry dish. 
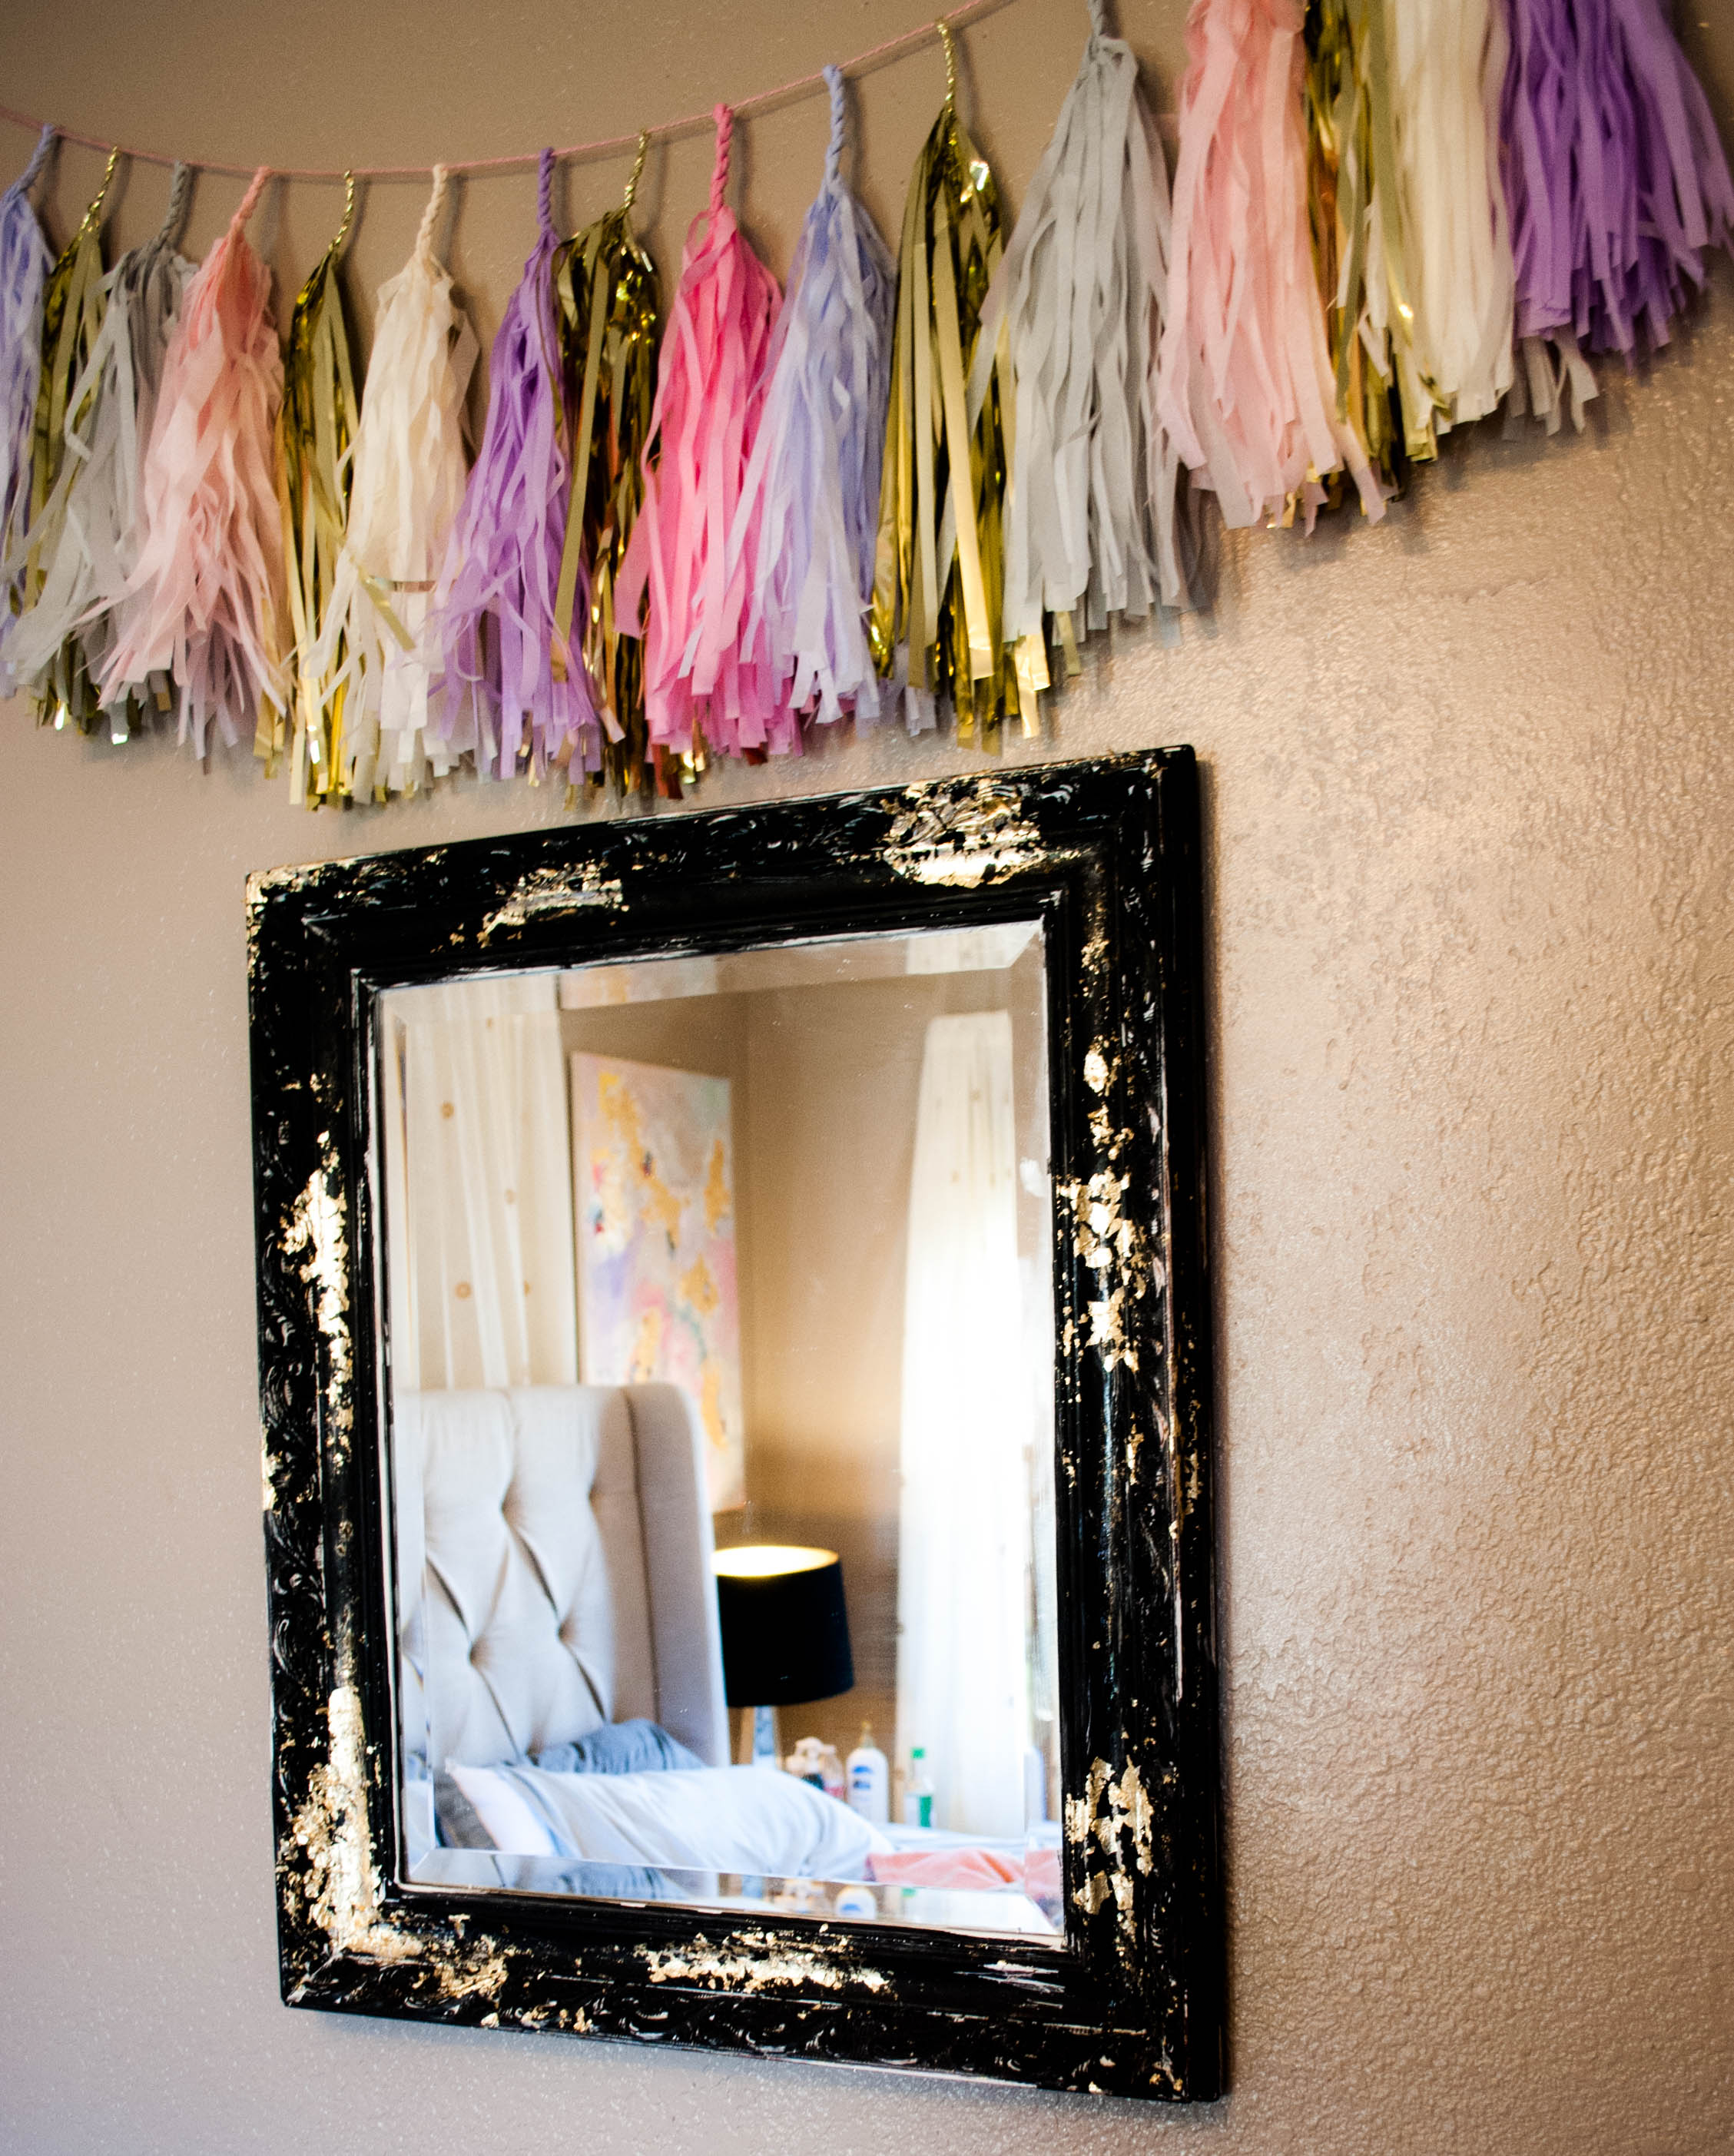
Or add some flare to a frame or mirror
And because Easter is this Sunday…

The possibilities are endless.
Xo, E.
 Noodles wanted to help with the photos for this post!

What an interesting idea to put metal leaf into art! I actually never tried it until I recently starting using silver leaf in some of my polymer clay jewelry pieces, but it looks so cool!
LikeLike
Love this! Im going to do one for zaileys room! Good job emily!!!!
LikeLike
Love you Sarah!!
LikeLike